
So, These awful things exist. Lets do something about it. These instructions are for making a 12V battery pack that can be used in a number of scenarios. I’ve used them for powering lighting and small art projects so far.
It will consist of 3 packs of cells in parallel connected to a BMS/charge/balance board in series that protects the pack and gives you a much more useful 12-10V. I’ve built packs varying in size from 13 cells per parallel string (3s13p) to 42 cells per parallel string (3s42p). If we were making higher voltage packs we would have a larger number of series elements as are proportional to the voltage.
Additional info on controlling lighting or solar charging isn’t primarily covered in this guide. But some tips are at the bottom.
This is intended to be a collaborative project for anyone interested to learn/teach others. So please contact me if you’ve anything to add/correct etc…
Safety
This is an electrical engineering project. As such there’s a few safety considerations to be aware of. Also some specific safety considerations because we’re dealing with lithium ion batteries. If you’ve not done something like this before. Please either find someone who has some experience to assist or take your lovely enthusiasm to some basic projects first.
The information here doesn’t guarantee your safety. Please don’t consider this exhaustive instructions, a perfect process or perfect safety considerations. I accept no responsibility for any injuries or damage caused to people or property. I accept plenty of credit for hopefully assisting in up-cycling these awful things. But you do so at your own risk.

Hot Danger
You’ll be using a soldering iron and maybe a heat gun. These get hot. Watch a guide on how to use these tools safely. If you start to feel hot from a hot tool. Stop doing whatever you’re doing and switch it off.
The cells you’re going to be making a pack out of are actually quite safe in my experience as far as lithium cells go. But don’t get them too hot if you can help it.
Spicy Air Danger
When soldering you shouldn’t breathe in the fumes. Open a window. Because I started when I was like 11 I’m quite fond of the smell of solder. But you can still enjoy it with a window open and your brain-cells intact.
Sharp Danger
You’ll be using sharp things. Be careful. If things get too sharp. Stop whatever you’re doing and put it down. Find a rag. This will be things like wire cutters, drill bits, craft knives.
Lithium Battery Danger (actually pay attention to this one)
Lithium battery technology has improved a lot since Lithium Ion batteries. Unfortunately because these vapes are mega cheap and mega awful. They still use Lithium Ions. These cells used don’t have some of the safety precautions that others do. Invest in a lithium fire proof bag. Use this to store cells while you’re building packs AND once you’ve built them into a battery pack.
If a cell looks damaged – Discard it
If a cell has a voltage of less than about 2.5v – Discard it
The dramatic and catastrophic failures of lithium ion cells that I’ve seen have all been have all been during charging, discharging or after some sort of trauma. The packs we’re making here should be very delicate on the cells. Even more so than their life in a disposable vape.
(Unless you do something impressively wrong. Or have damaged tools. There shouldn’t be any electric shock danger)

Tools and Supplies
Basic Electrical Engineering bits
Multi Meter
Insulation Tape
Soldering Iron, Solder, Soldering iron stand with a sponge
Wire cutters (small side cutters are best) and strippers
Pliers
Lithium battery components (items linked)
3S BMS with balance charging. This adds some safety precautions to the pack and helps charging. I’d advise picking the smallest amp rated one unless you know better.
2 Pin JST connectors with wire tails. To connect between the parallel packs and the BMS. You’ll need to change this if you’re making a big pack for larger currents.
Woven Copper Pest control webbing stuff (yes, really). To act as the bus bar between all the cells in a parallel pack. The cells we’re using have solder tabs and don’t need spot welding.
Electrical Tape or Battery heatshrink tubing. To wrap and protect the parallel packs of batteries.
XT60 connectors and heatstrink. To provide power out to whatever you’re powering.
Inline Fuse Holders. Additional level of protection over the BMS
12AWG wire
Vape Selection
There’s an enormous amount of different vapes with different sized cells inside them. If you have access to a lot you can afford to be picky about only using the higher capacity 1500mAh cells. Instead of the much smaller 550mAh. This results in a higher capacity battery simple because there’s less empty space between cells.
You can see the most common two vapes I’ve dismantled in the top image in this page. The square ones being 1500, the smaller ‘elf bars’ being 550.
If a vape looks like it’s been waterlogged or is excessively dirty. Take it to a WEEE recycling place.

Dismantling
Fortunately… because they’re so cheap and awful. They’re very easy to dismantle. You’ll need a pair of pliers and your wire snips. Do this with decent ventilation. Ideally wearing gloves (I normally do). I’m not a smoker and definitely felt an unpleasant nicotine high after dismantling my first 100s.
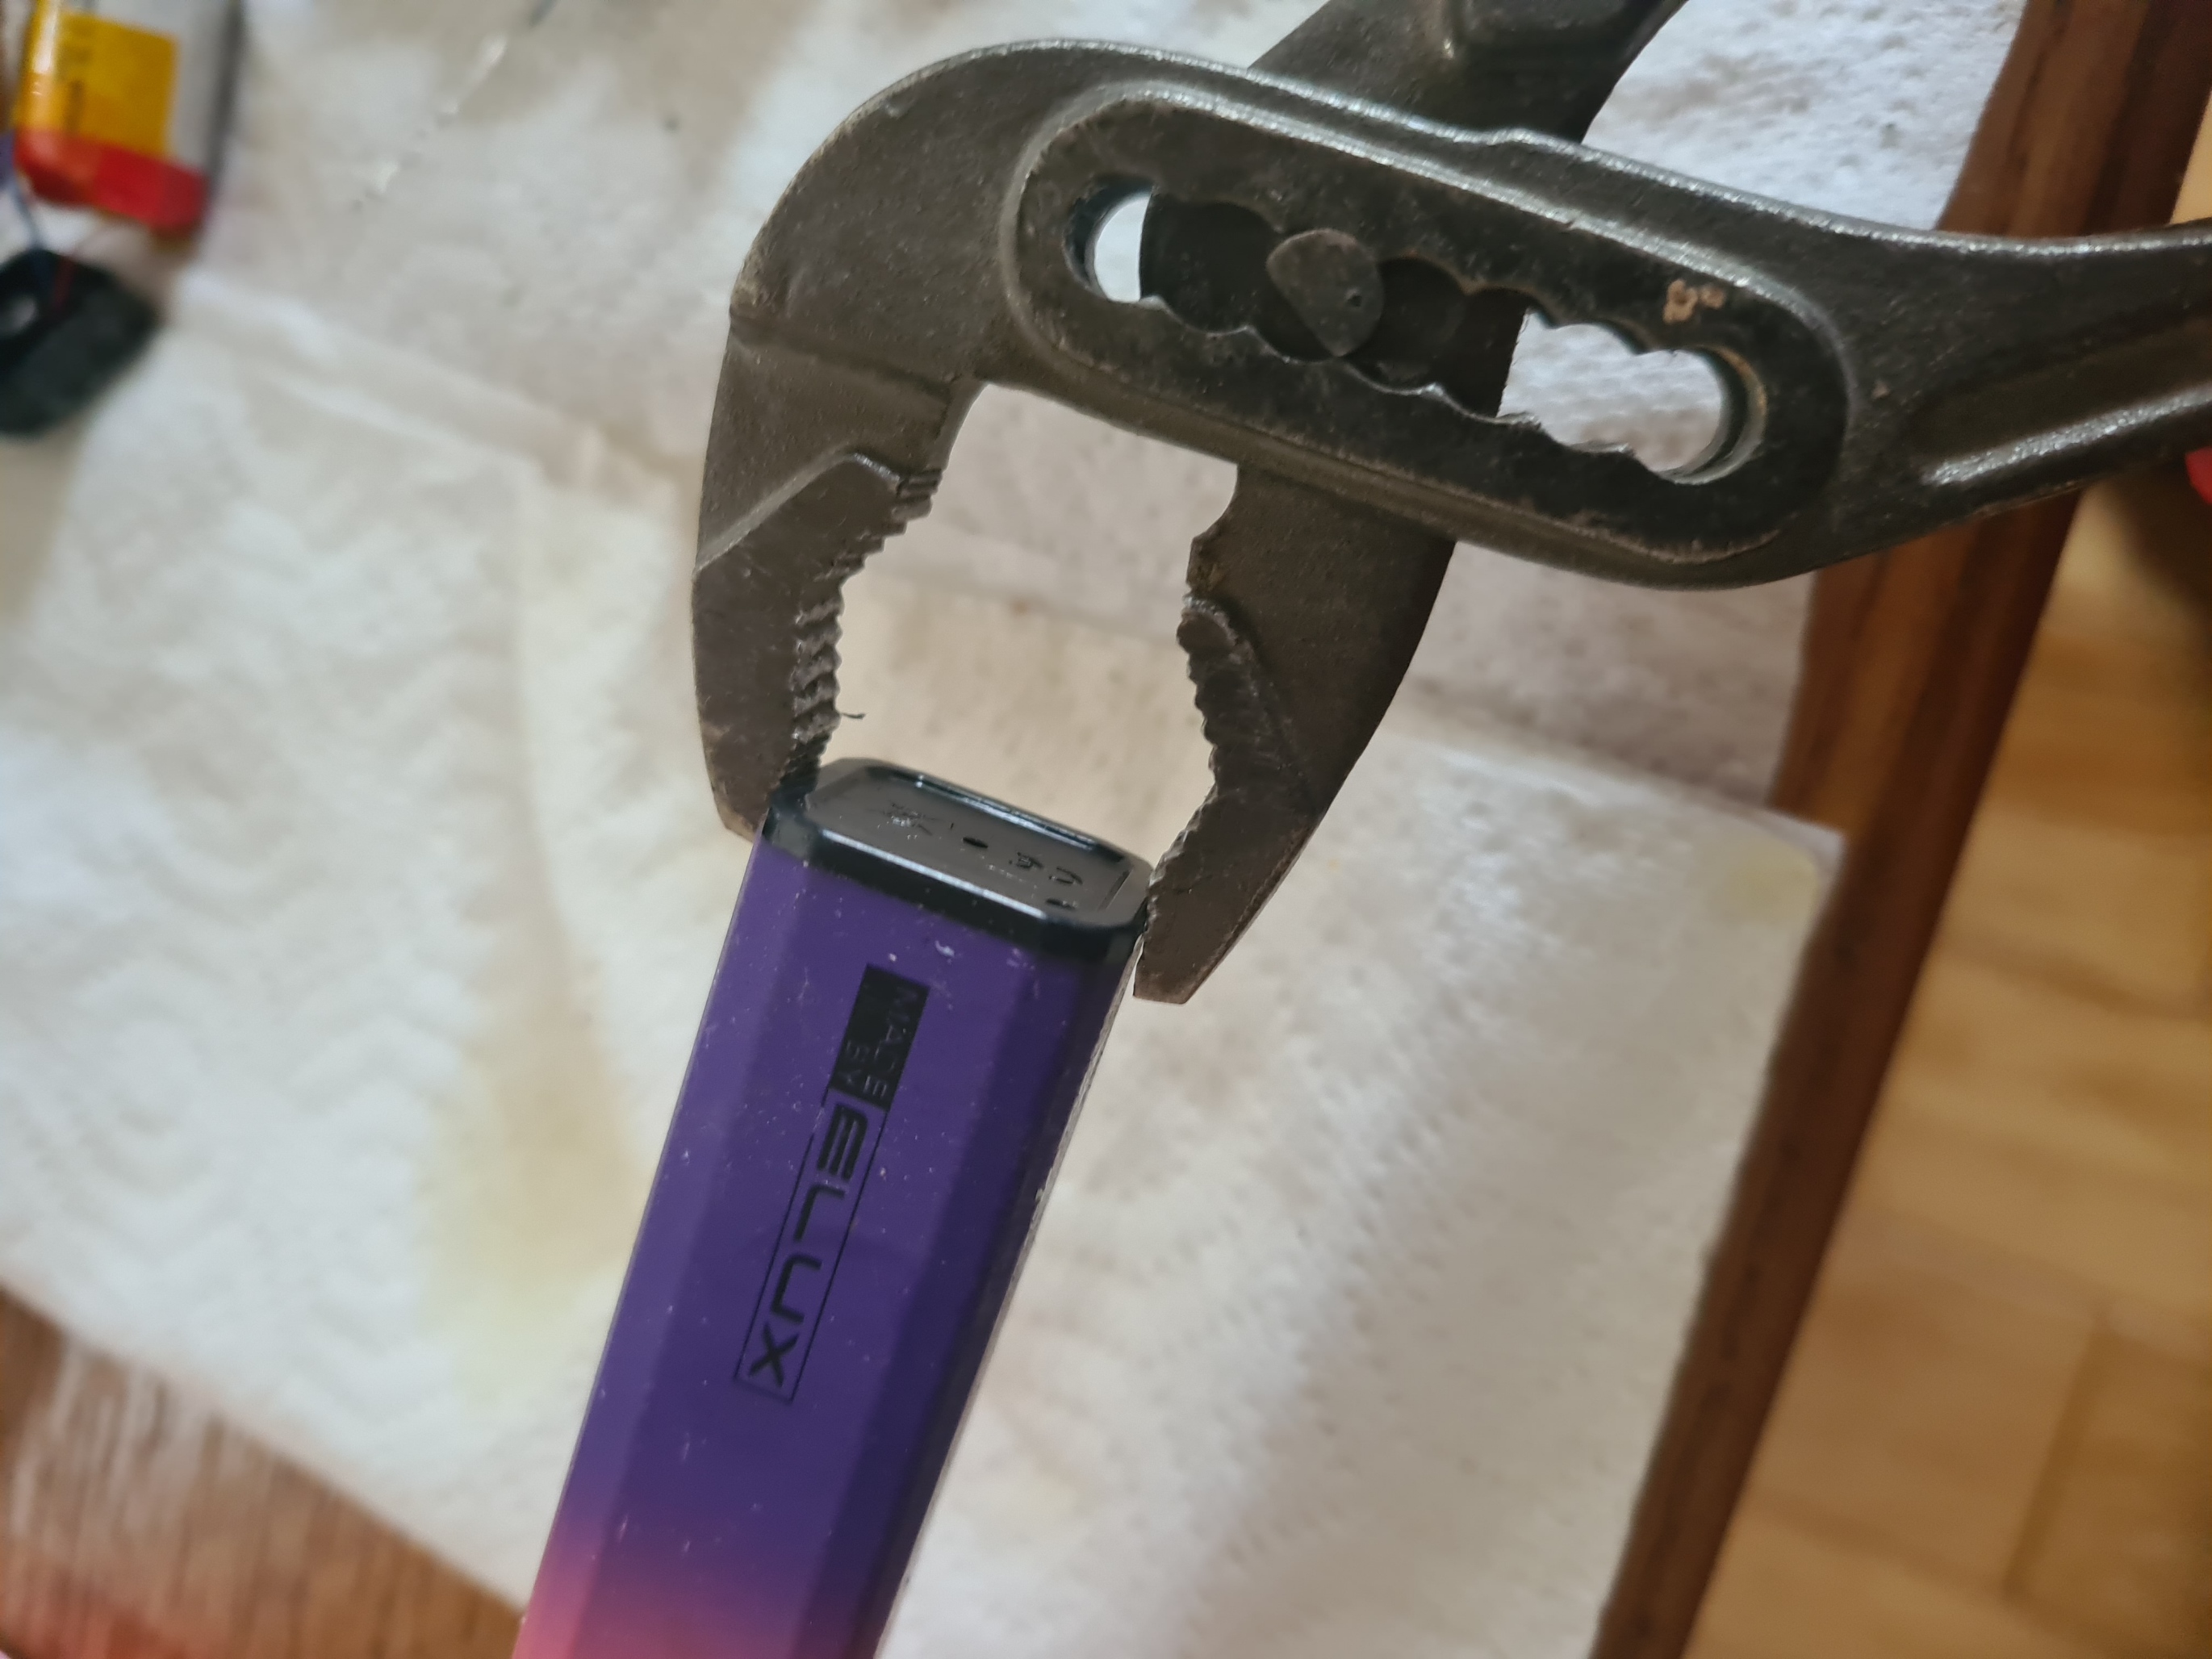
Pull the plastic end off with your pliers. (I know these are pipe grips pliers were in my van when I took photos). Be careful as it IS possible for them to slip and really upset you and your fingers.
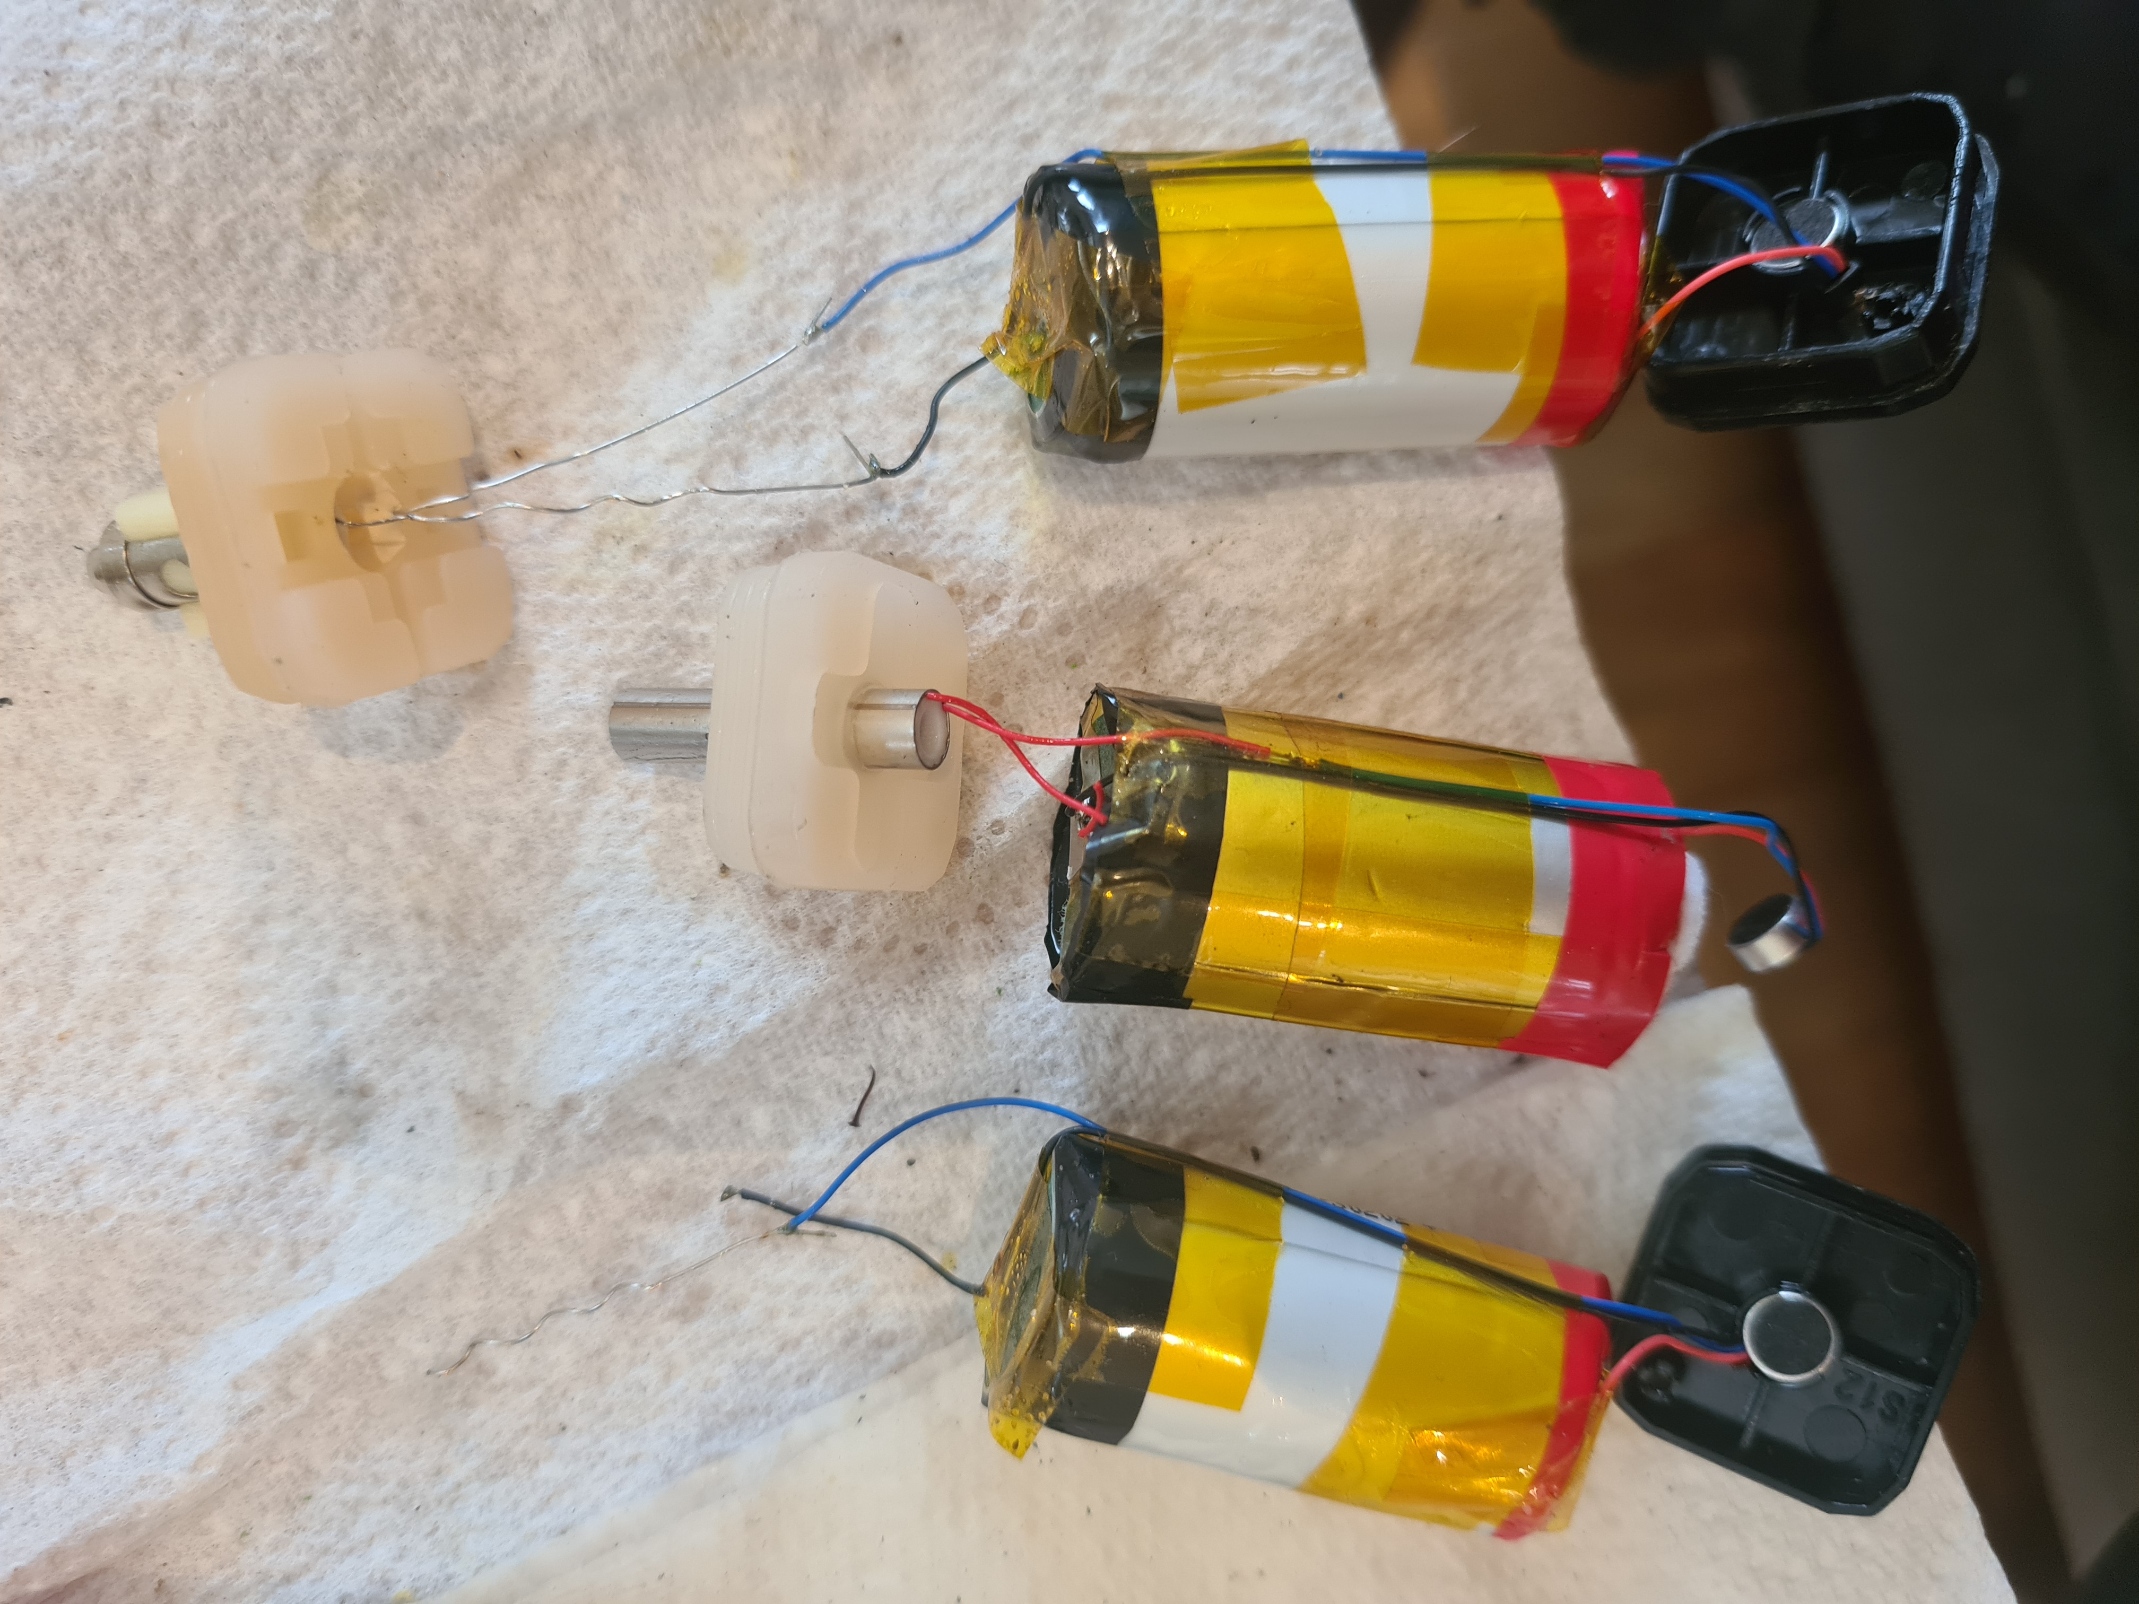
When you pull it out. You’ll get some quantity of the guts of the vape. We only want the battery part. Recycle (or in my case hoard) the rest.
Snip all the wires at the top and the bottom of the cell. Do all the the wires at one side. Then the other. I’ll not name the colours as I’ve seen them be all sorts. Just make sure you get all of them including the one taped to the body.
Testing/Sorting
Right… So we have our cells. Lets solder them together… right?!
NO! WRONG.
You should have a pile of cells, they need checking to ensure they’re not too discharged and organizing into groups that will be happy with each other. To do this you’ll need your multi-meter and a number of bags or pieces of paper you can pile them on.
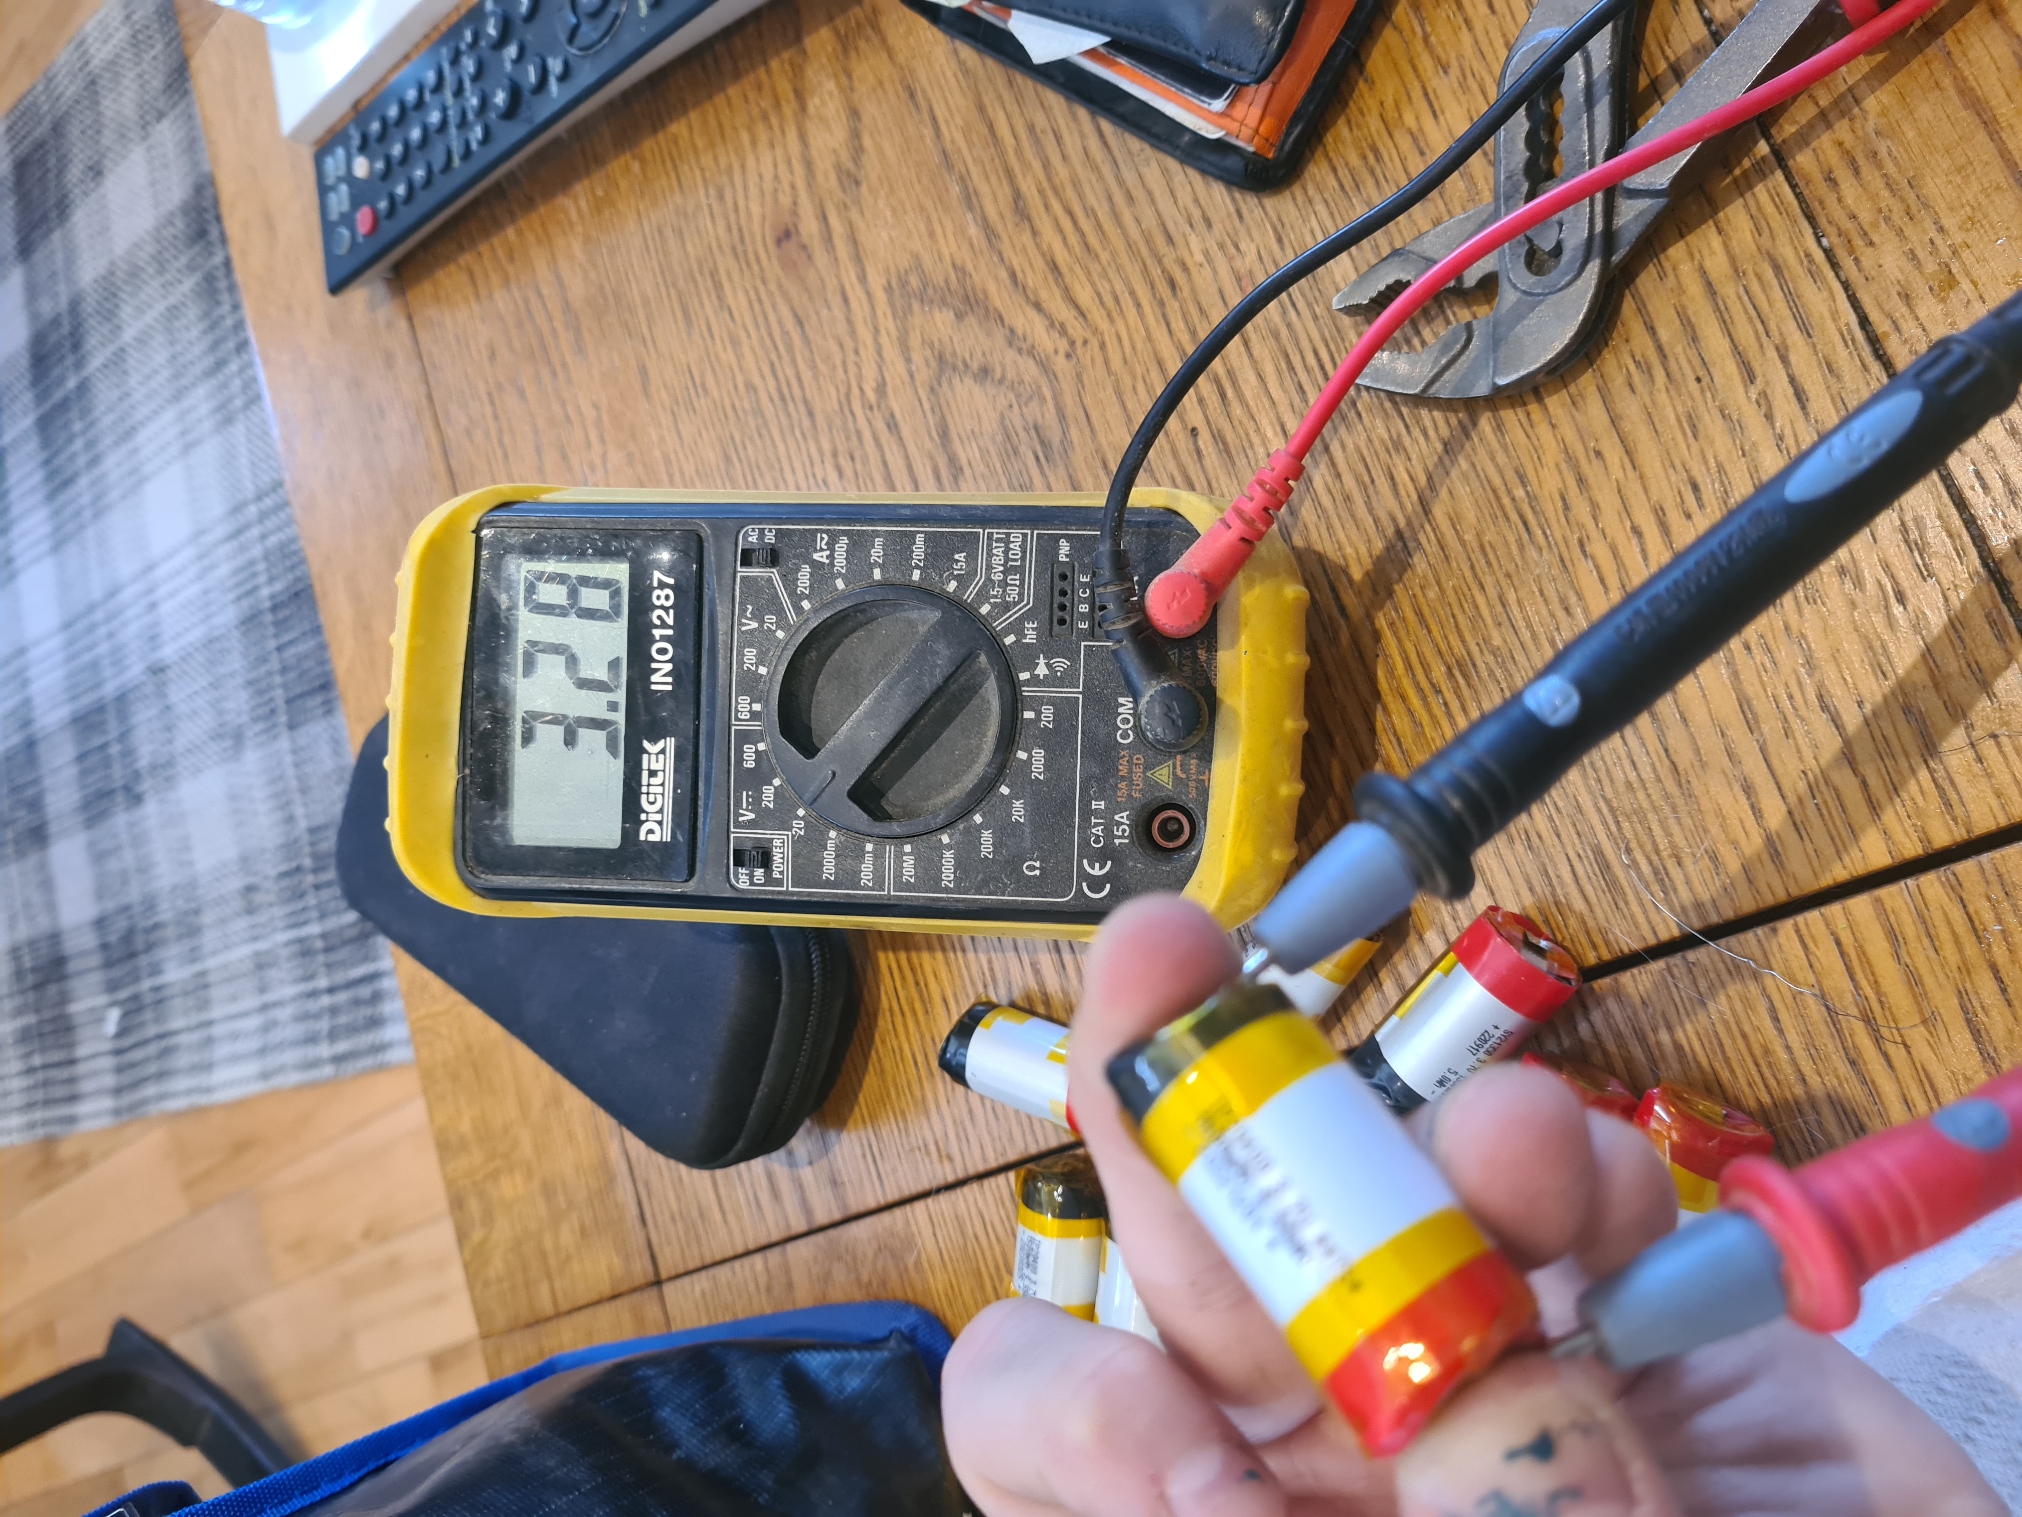
Take each cell and check it’s voltage. Make sure your meter is set to DC voltage. If it’s less than 2.5v discard the cell. It’s likely that it’s been submerged in water or damaged in another way as the vape is meant to cut out and stop working before 2.5v
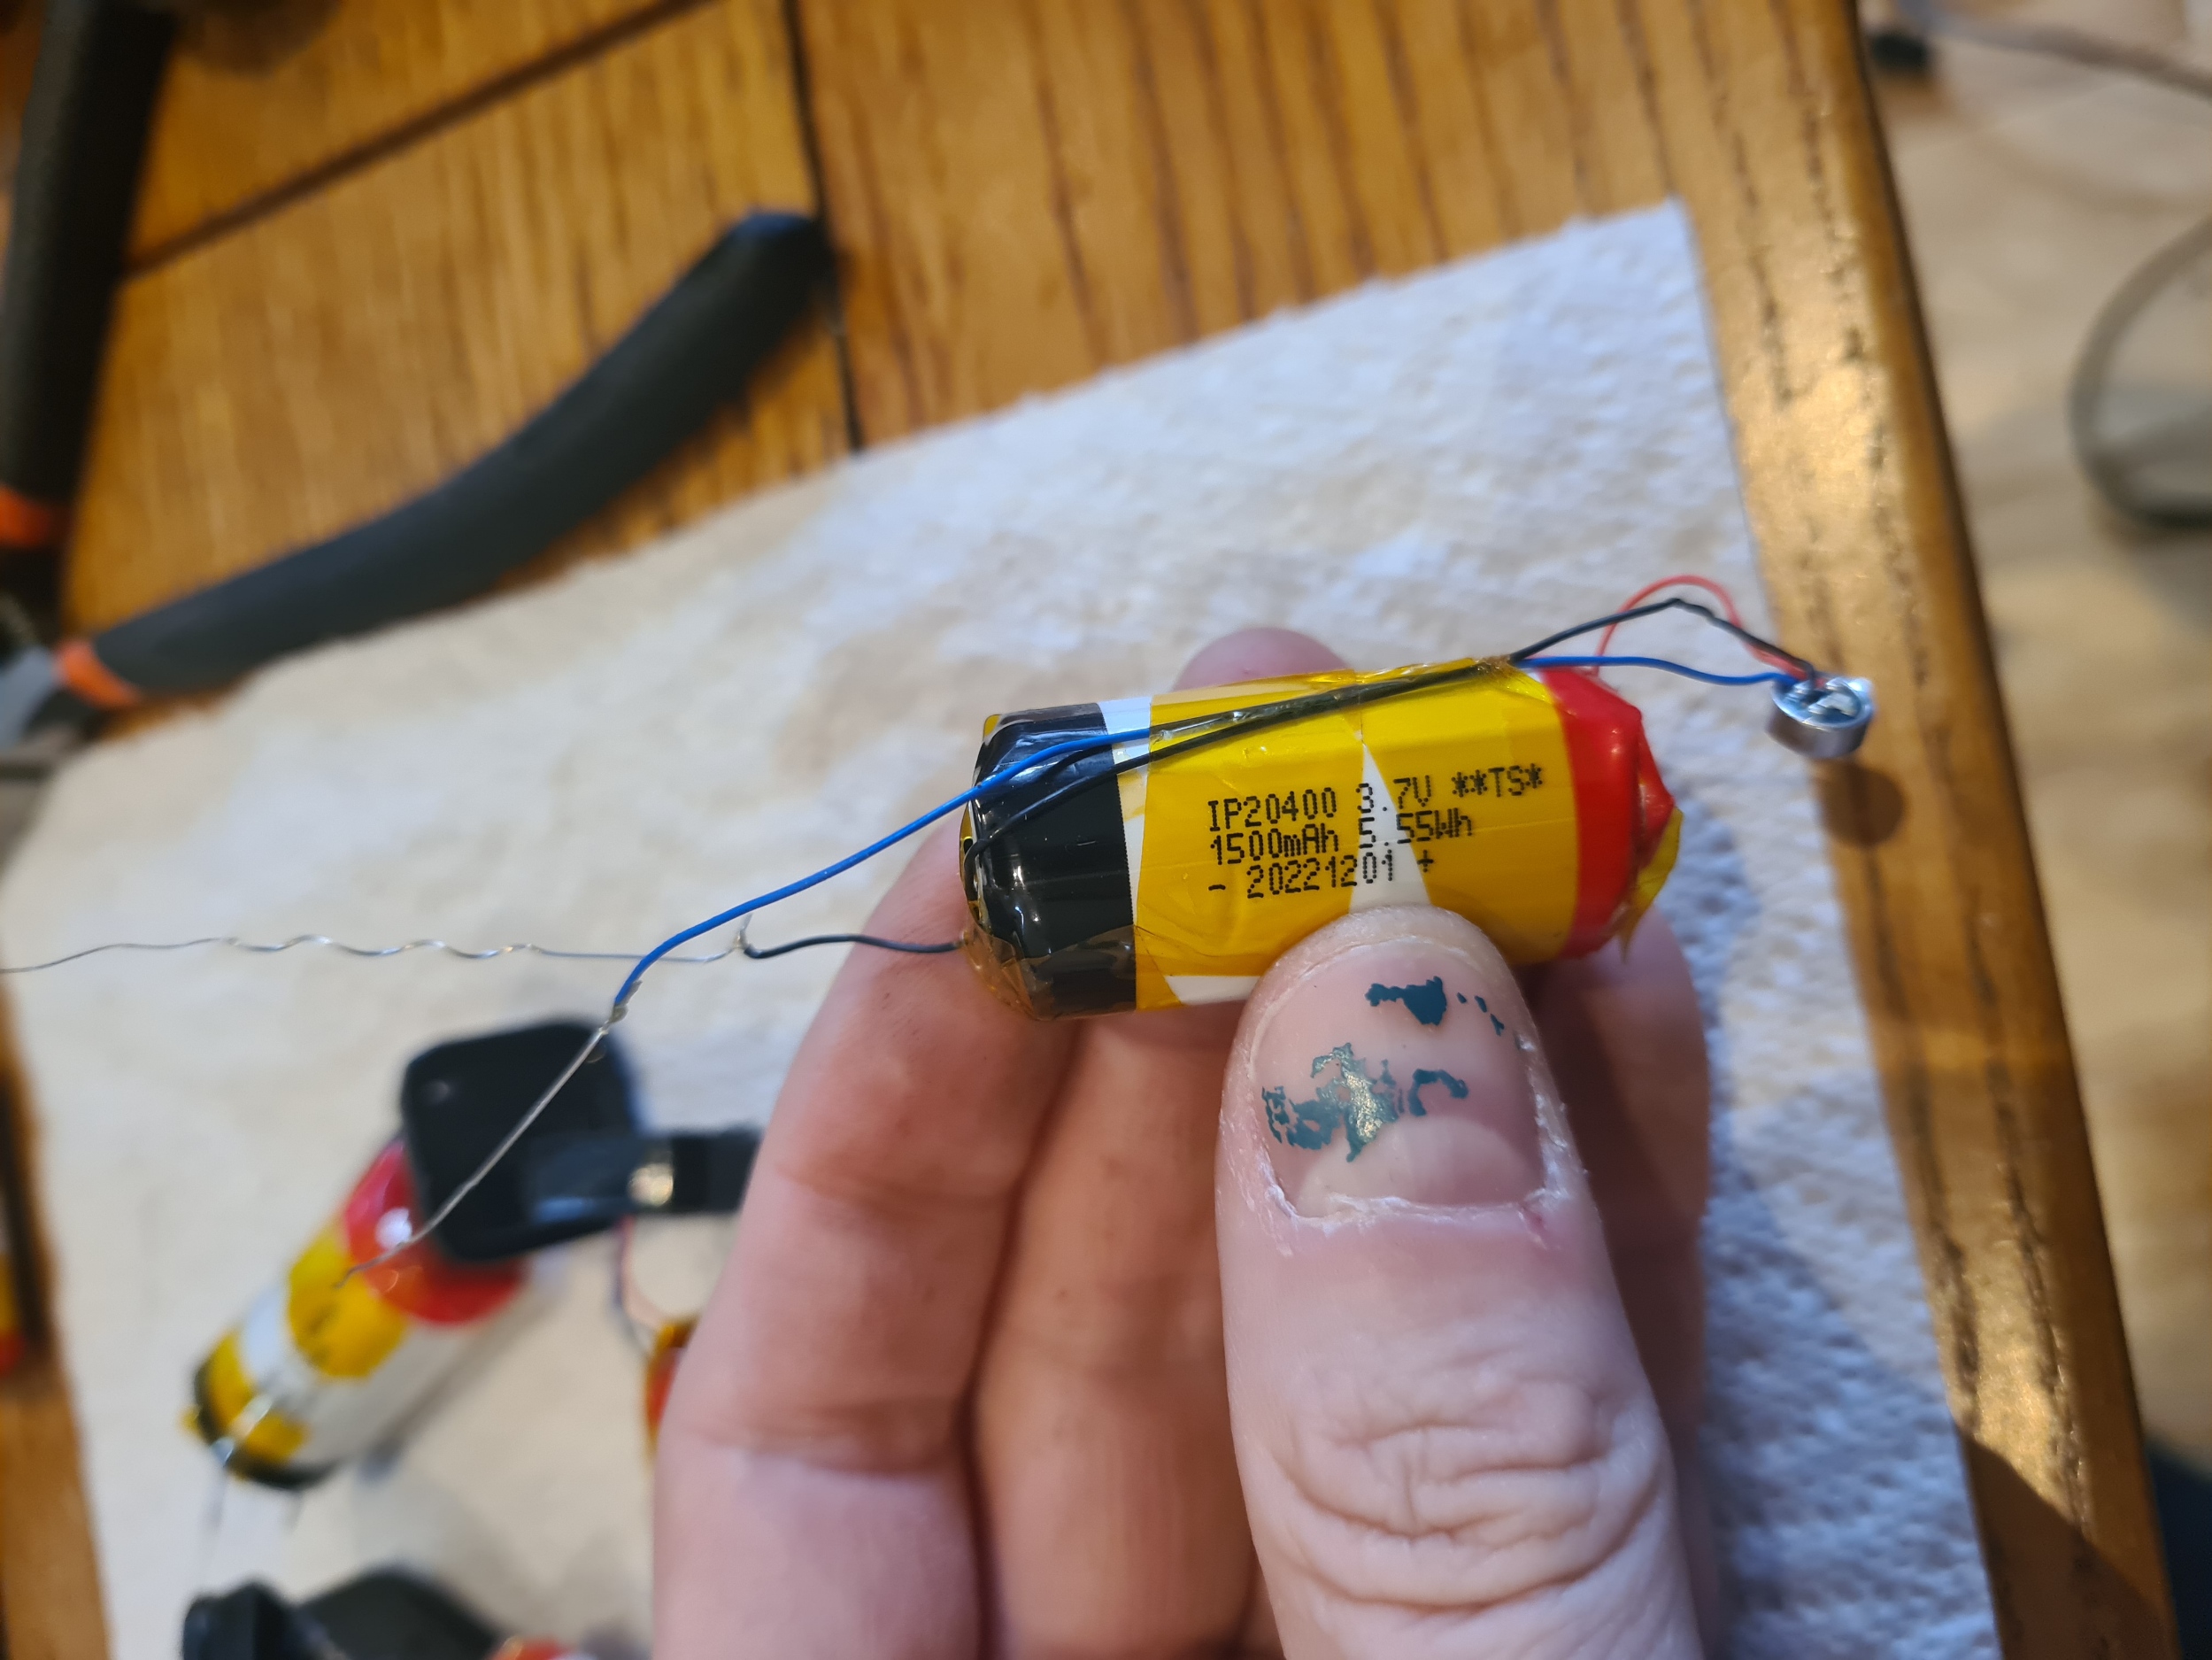
While you’re at it. Remove the tape covering the solder tabs on either end. We want access to them in a bit and the tape is in the way.
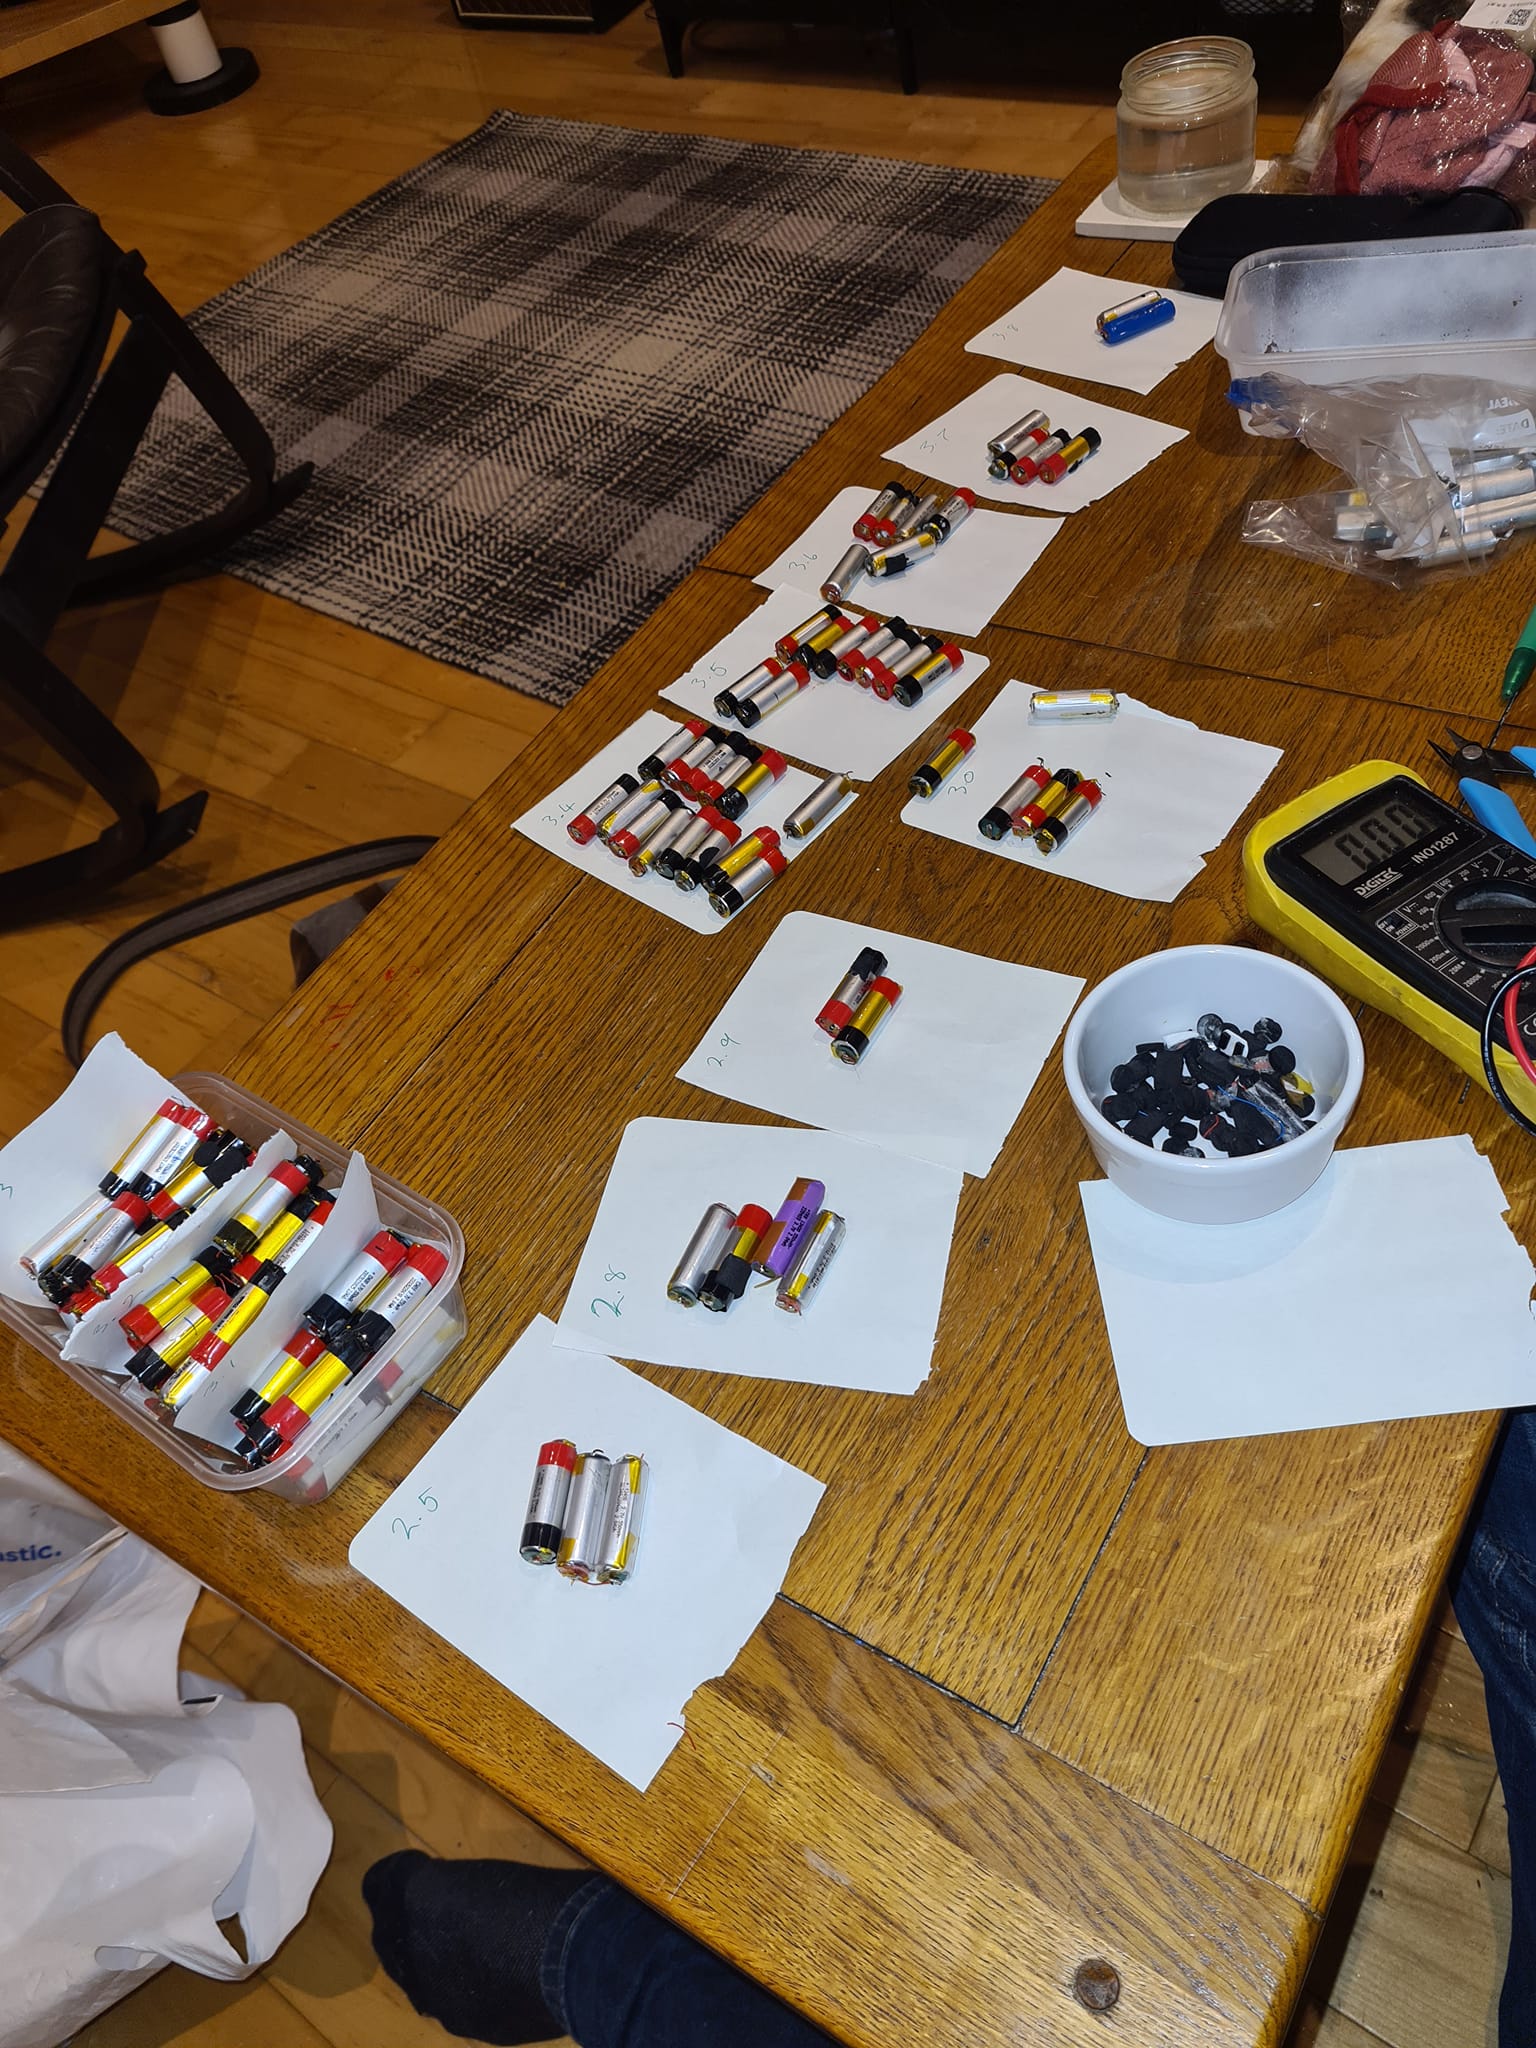
Organise the cells into 0.1v groups. Ie 2.5, 2.6, 2.7, 2.8 etc… (Teaching you how to round numbers is out of the scope of this guide)
We do this because we want to group cells together of a similar voltage. This means they don’t suddenly have to charge or discharge a huge amount. Current wont flow between cells of a similar voltage.
If you’ve cells with lots of different voltages. Consider getting a lithium battery charger and charging them all until they’re full. They’ll be happy being connected together then.
Assembly
First we need to figure our what sized battery we’re going to make. Take a look at the organised cells you have. Can you group them logically into three groups without having any of them having to mix with groups with vastly different voltages? Ie if you can make 3 groups of 10 with each group of 10 only having 0.3v between the lowest and highest you can make a 3s10p pack without any additional charging etc required.
If your groups are vastly different or you don’t have a lot of cells. Look at buying a lithium battery charger and charge all your cells up so they’re the same voltage.
Now, your process will vary here depending on how many cells you have… and what bits and pieces you have lying around.
You want to create yourself a bit of a jig of sorts to hold your cells in a a square shape. All the same way up. Ie positive up or negative up. Also make sure they thing you’re holding them with isn’t conductive. (I’ve got card under them).
I’m afraid I’ve failed you here by not taking enough photos.
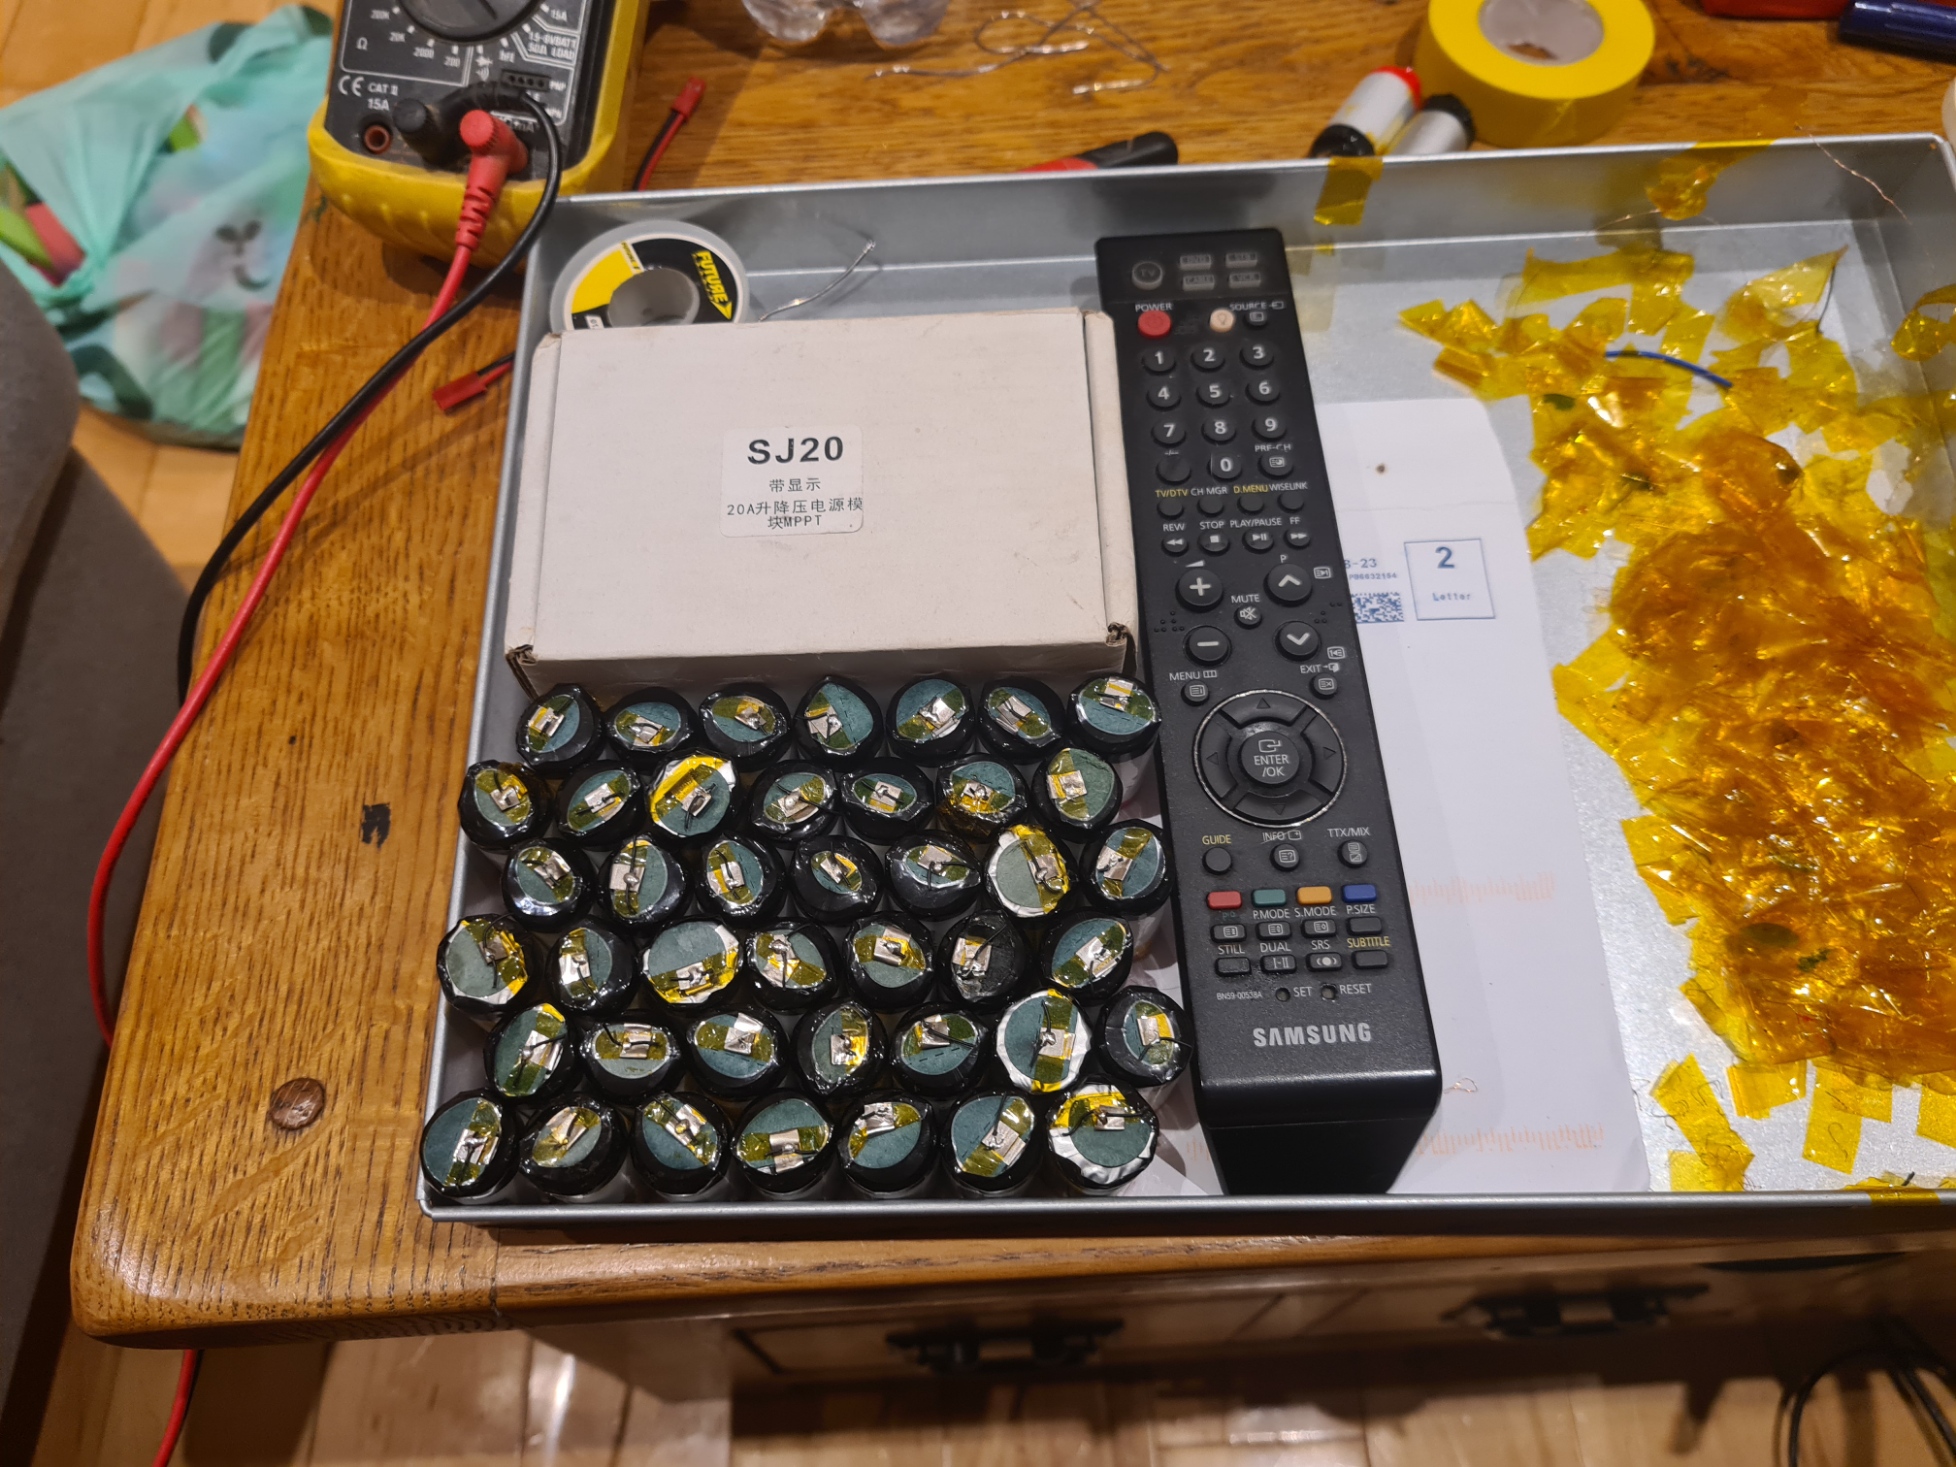
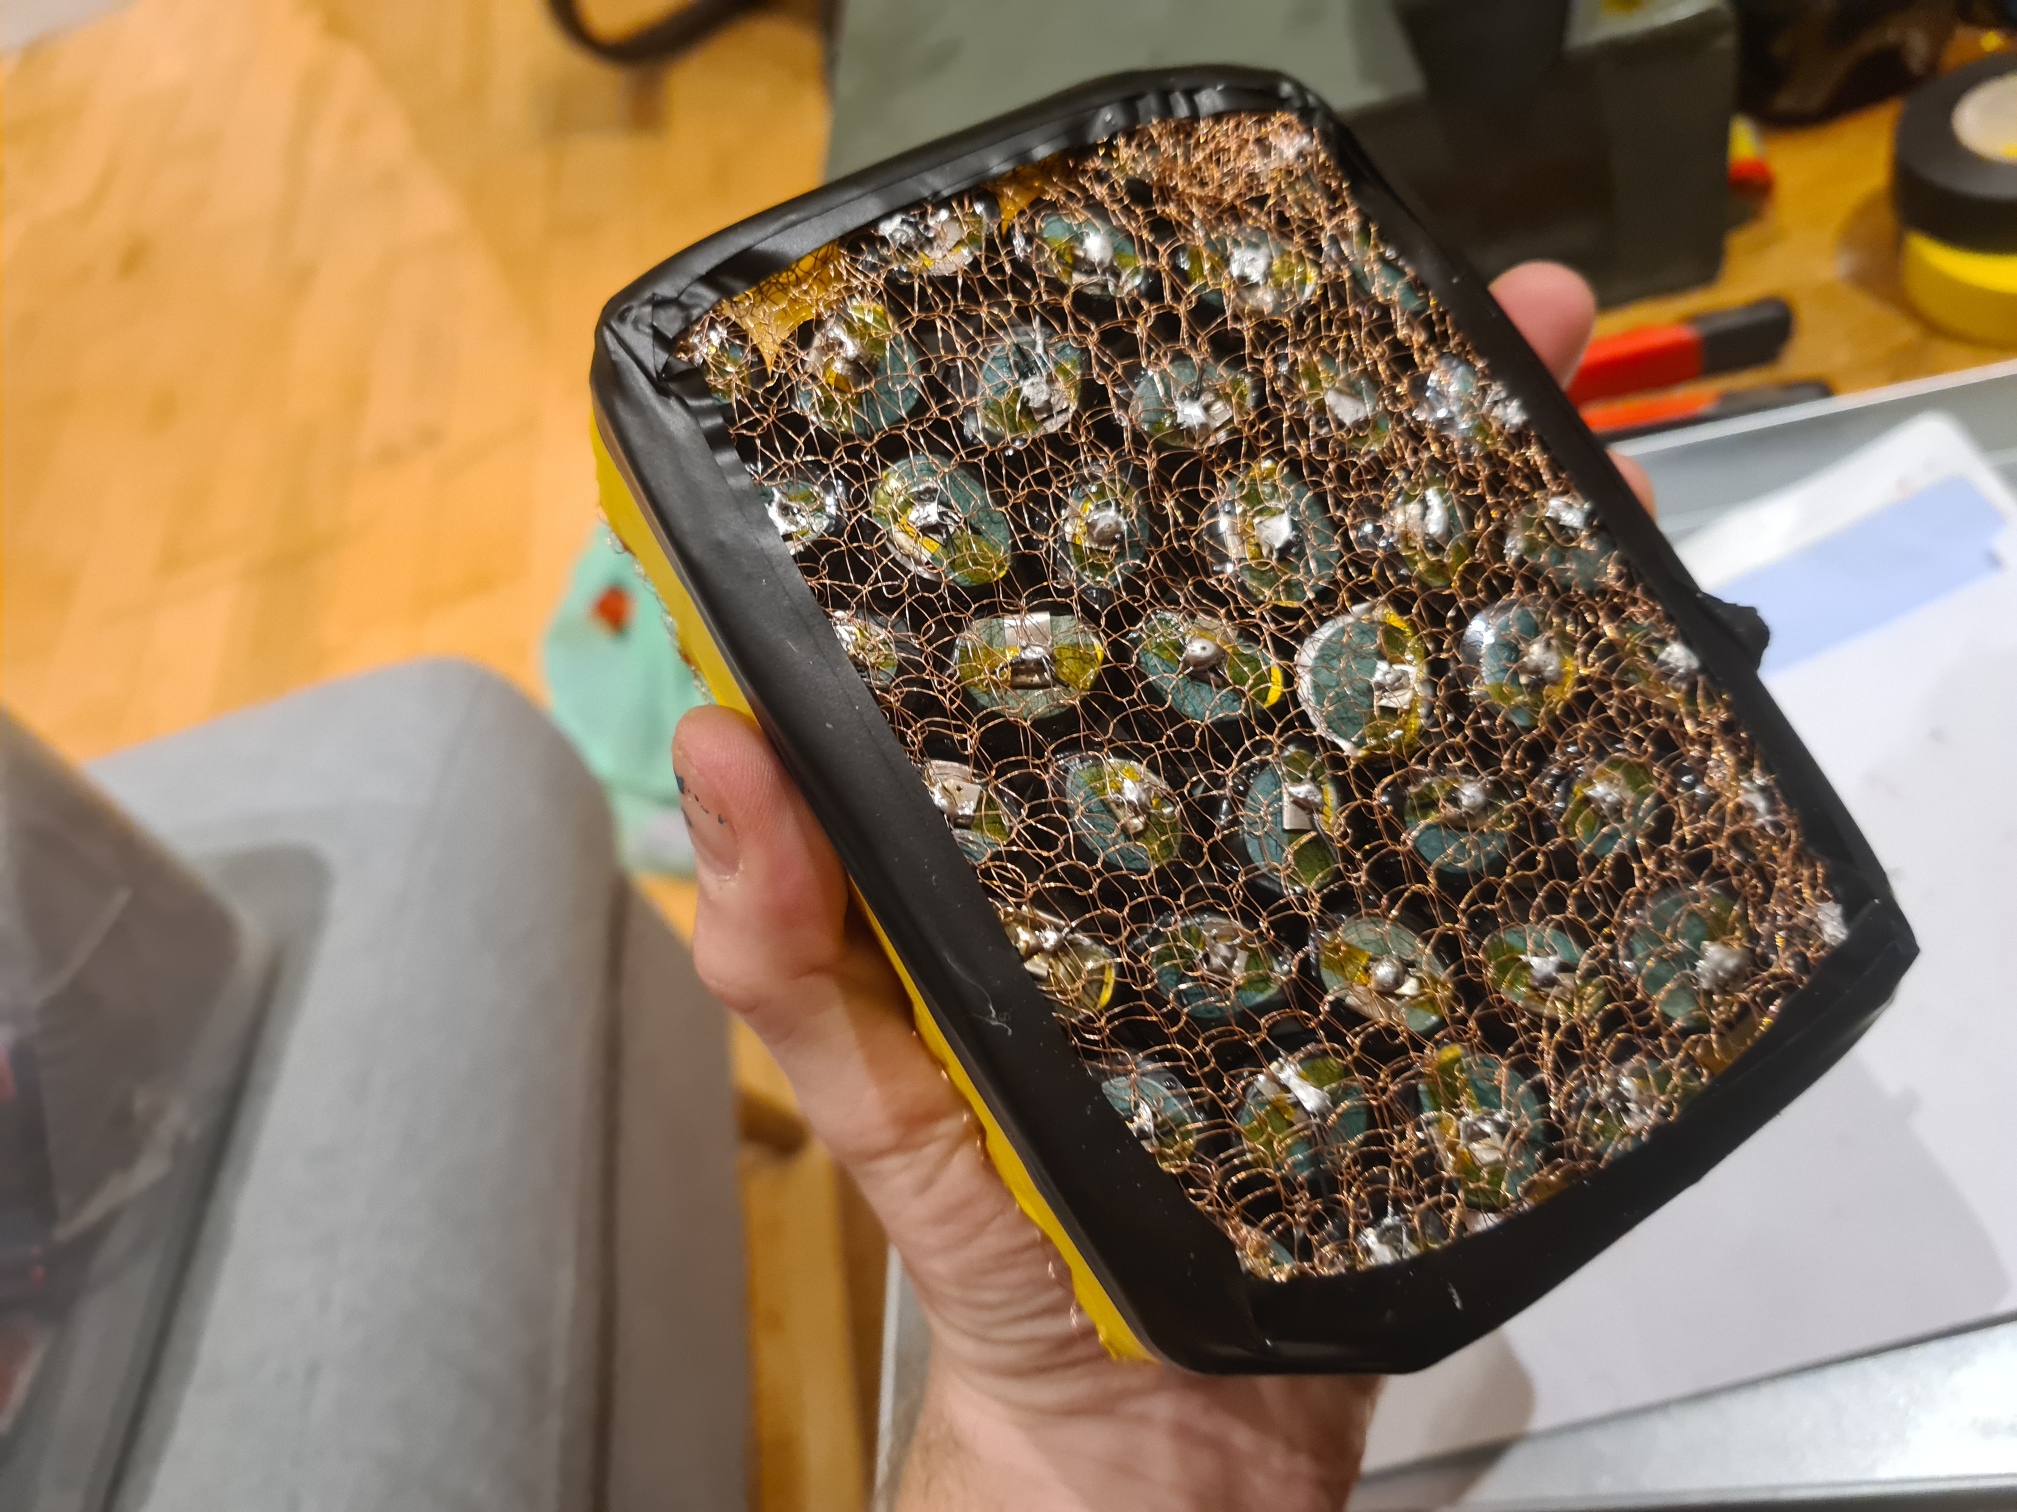
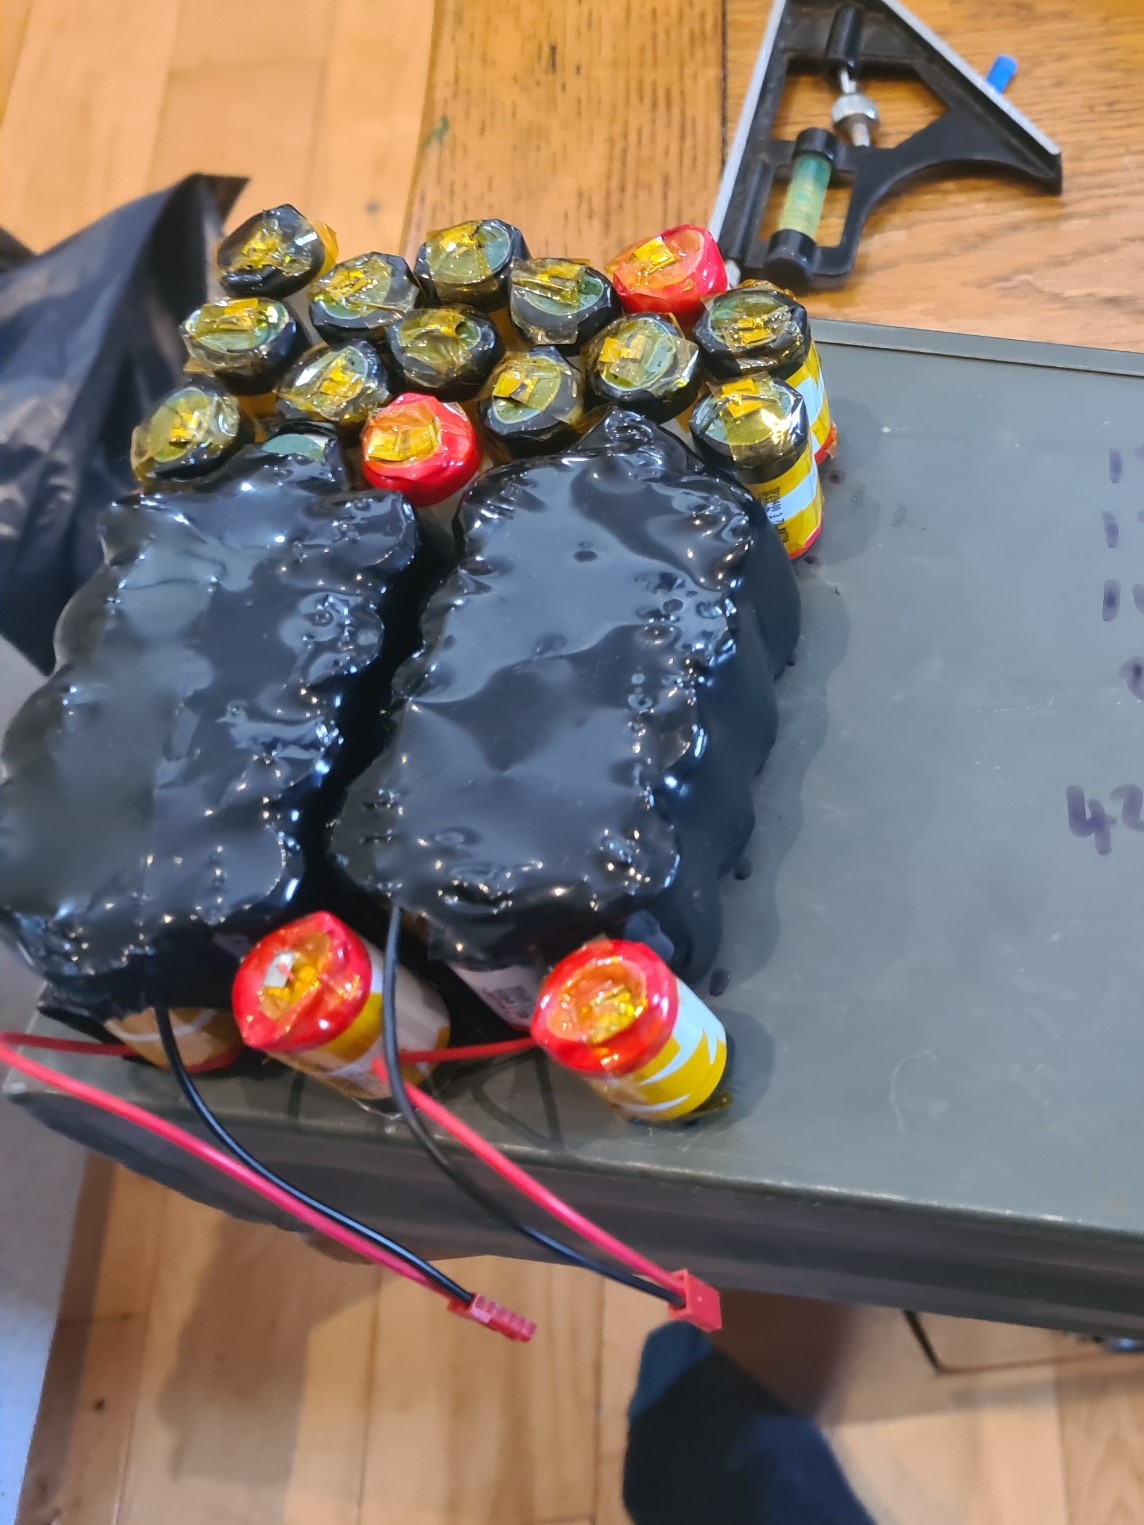
You’re going to lay down a piece of your woven copper webbing. Go between each cell and solder the webbing to the little solder tags on each cell. You could use multiple layers if you’re building a high current pack.
The webbing will act as both the bus bar and also the structural element holding the cells in shape.
Trim the copper to shape and insulate it with tape around it’s edges.
More failure on my part. Carefully flip the pack and do the same on the other side.
I’ve used black tape and red tape to make it obvious which side of the pack is which.
Make sure you don’t short the positive to the negative side of the pack. There’s a decent amount of power here. You won’t get a huge explosion or anything. But you’ll quite easily melt through the copper mesh or thin wires. Also the cells won’t like it.
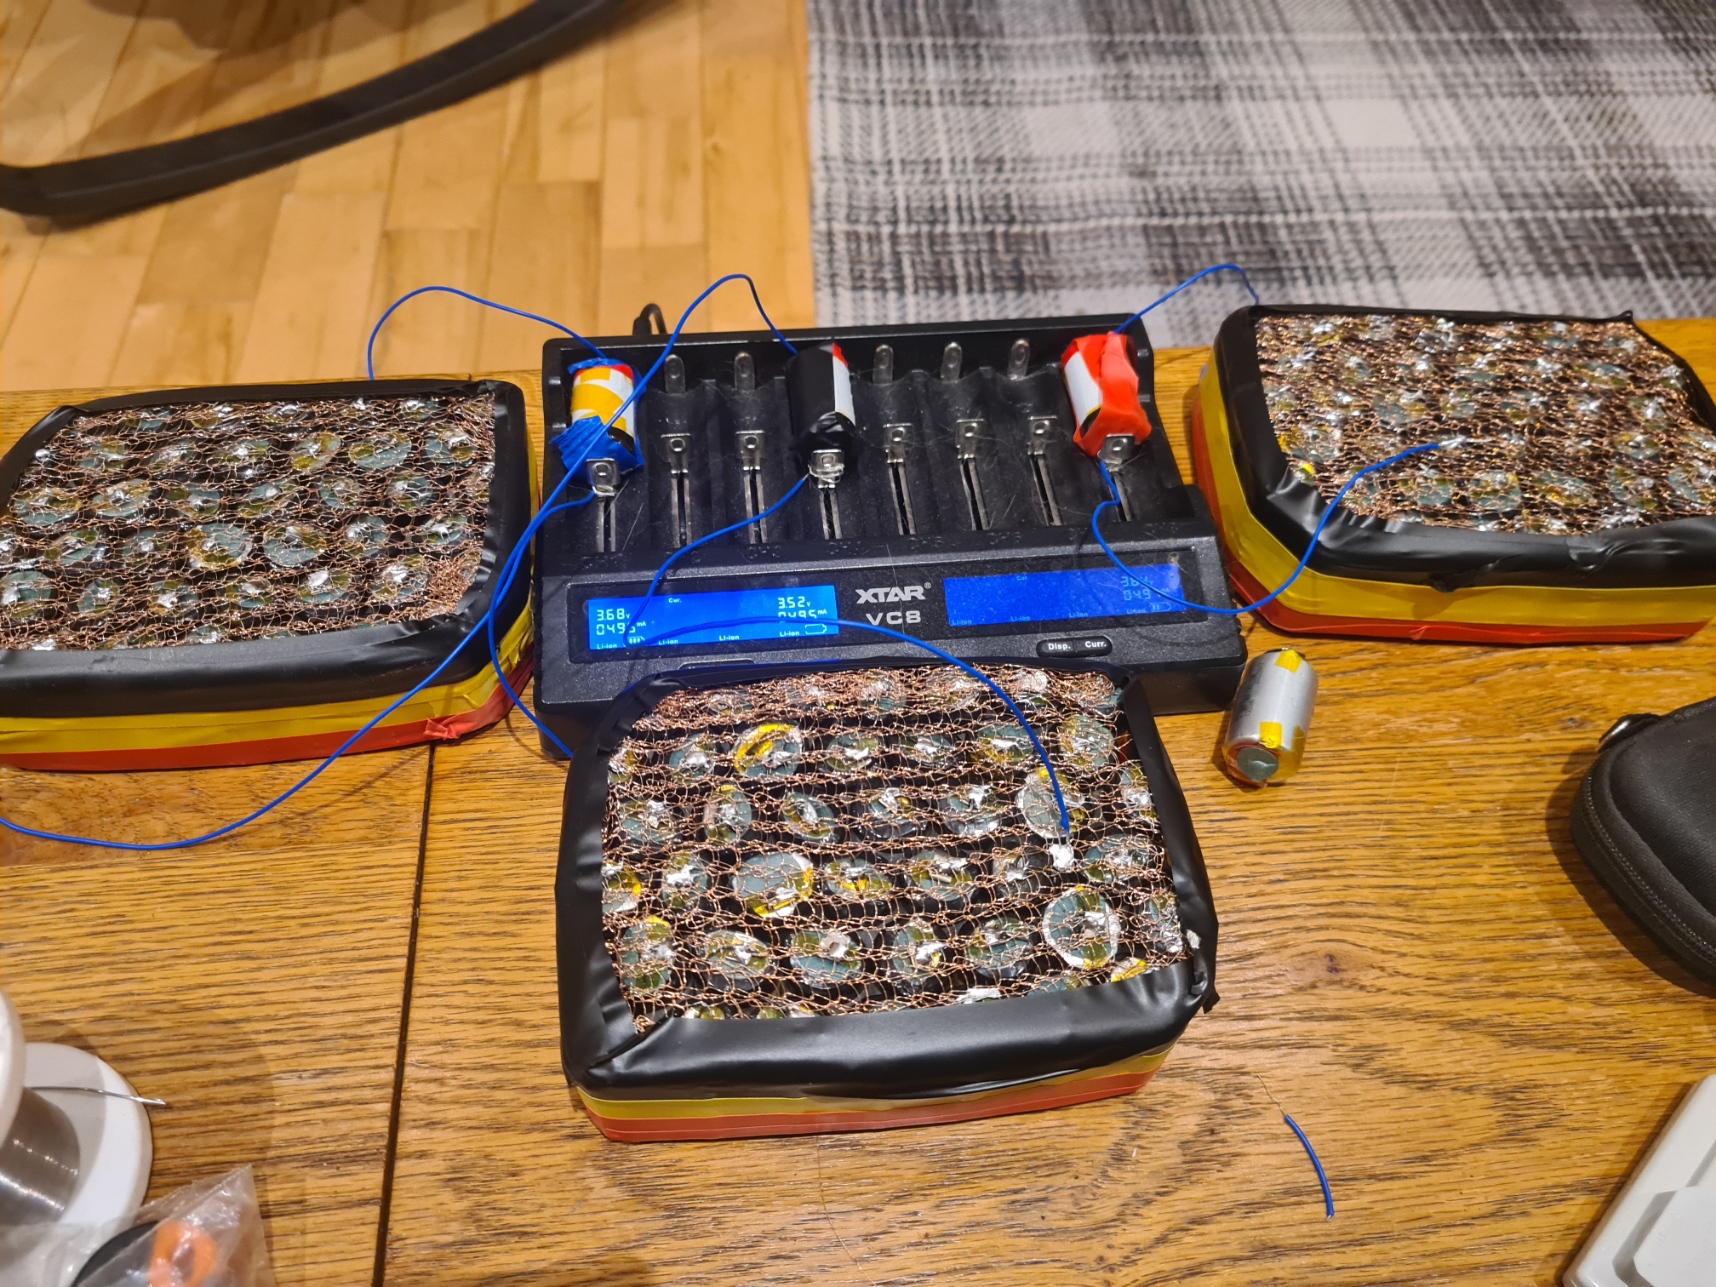
I soldered wires to each side and charged them separately in this picture.
(Blue Peter would hate this continuity)
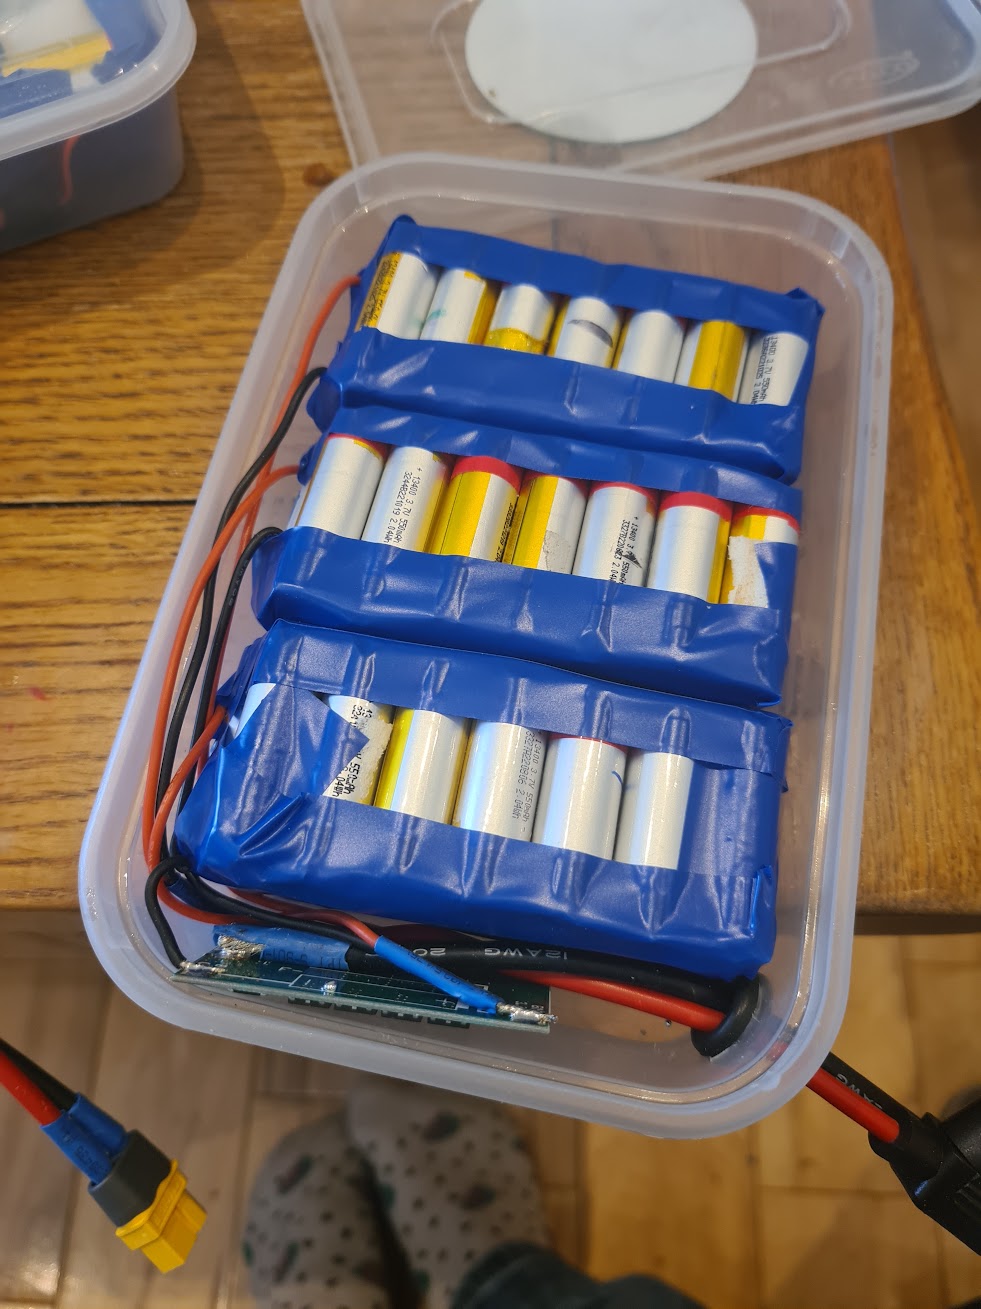
Here in a totally different battery pack you see how I’ve wrapped the packs in black heatshrink. (Ignore the other cells around. I was measuring them up for the case).
Before doing that I attached the positive end of one of the female JST tails to the positive side of the pack. The black to the negative. When doing this I made sure to put as much distance between them as possible. Ie imagine 10 were in a straight line. I’d connect the positive to the positive of cell 1. Then the negative to the negative of cell 10.
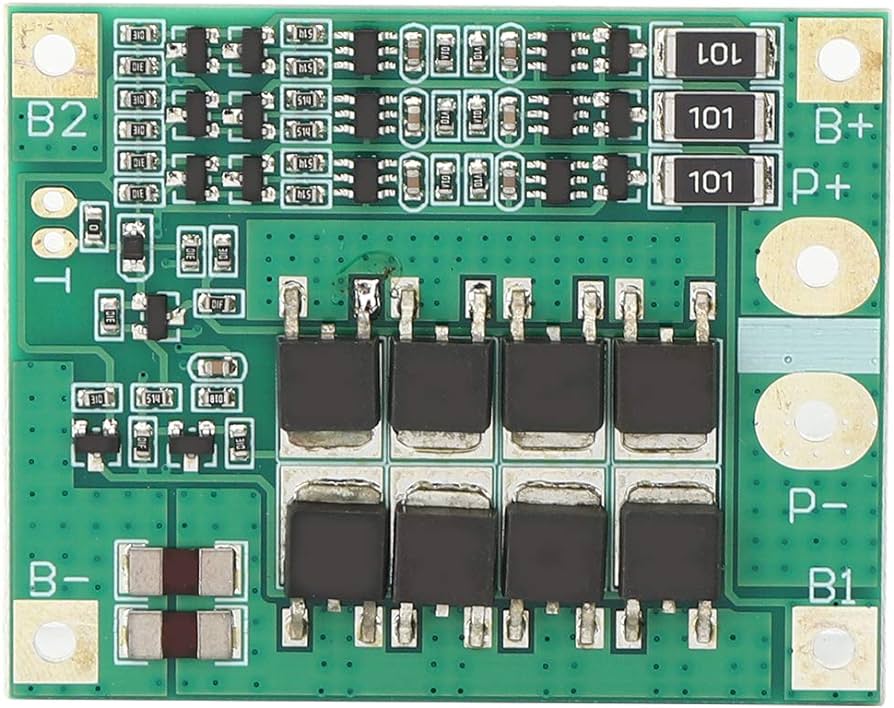
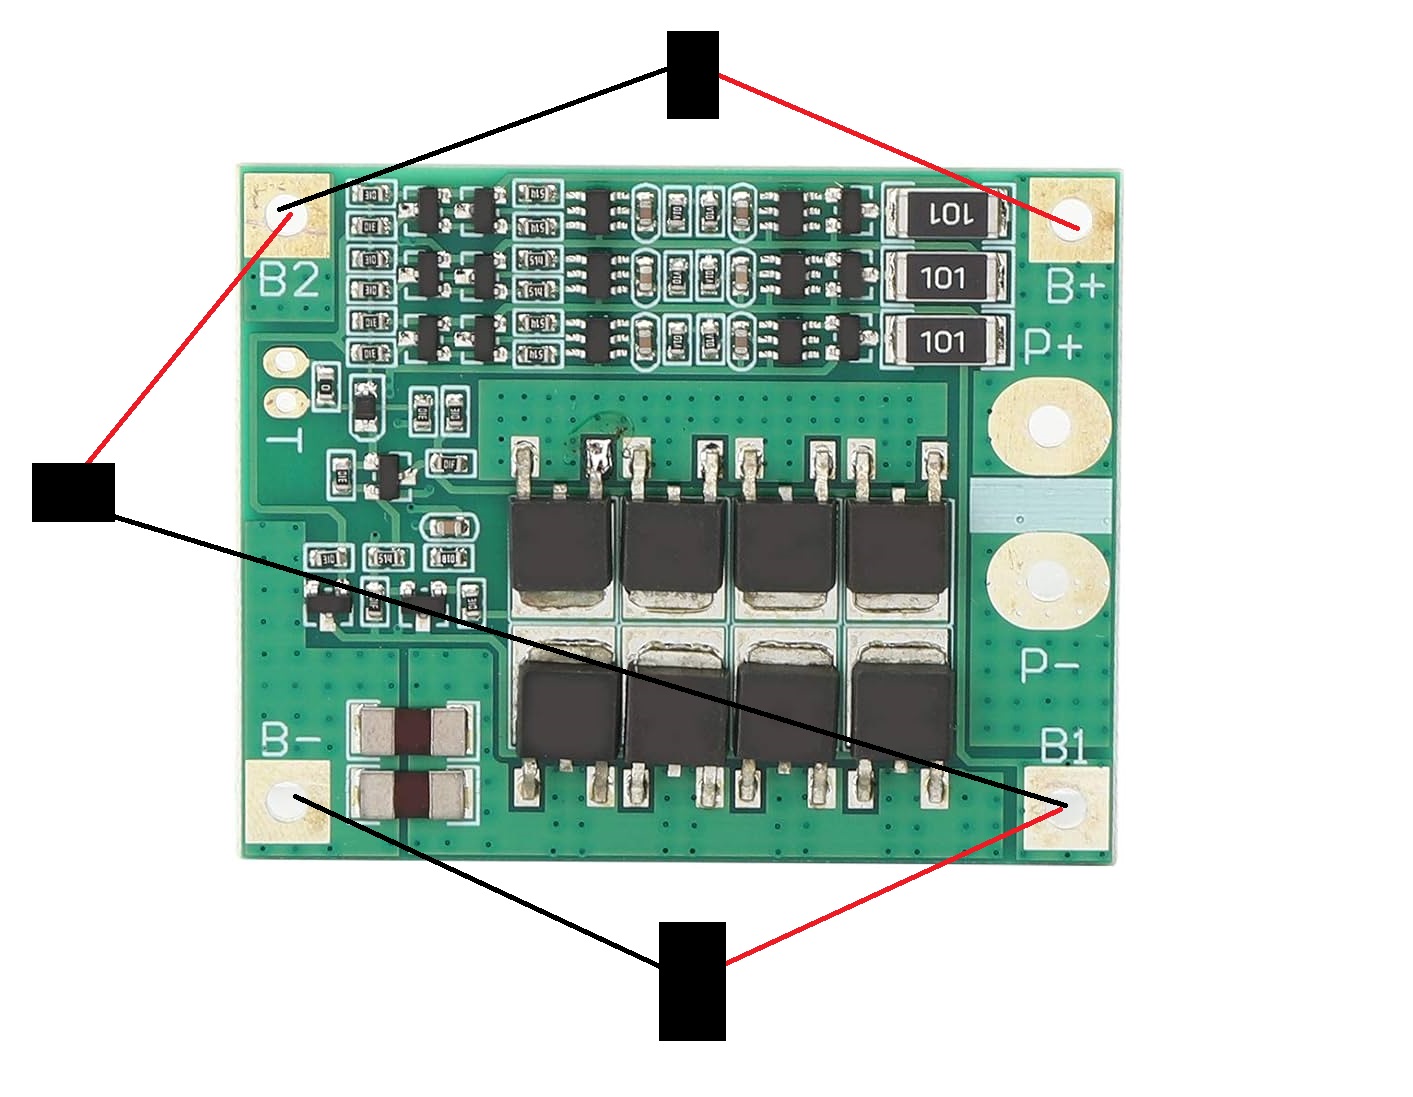
Your BMS will look a little like this. The 4 solder pads on the outside are what we’re interested in at the moment. If it doesn’t look exactly like this. Don’t worry. There will be similar markings.
(I’m so sorry)
Take 3 of the male JST connector tails. Wire them as shown. This connects the parallel packs in series with each other. But also to the BMS so it’s able to balance them charging.
Connect one of the inline fuse holders to the P+ (positive) on the BMS and a length of black 12 AWG wire to the P- (negative)
Depending on the BMS you’ve bought. Inset the next fuse up from it’s rating. Ie a 15A BMS use a 20A fuse.
If you want to build a modular system. Solder an XT60 connector to the end of those tails.
Bang it all in some sort of enclosure and you’re done.
Usage
Depending on your BMS (look at the data sheet). You can charge it by providing 12-13v. It will balance charge your separate parallel packs and provide you power back until about 10.5v depending on your BMS).
Solar charging and other bits?
You could solar charge this pack using any solar charge controller that is happy providing 13 volts. However most of the off the shelf ones i’ve seen are expensive.
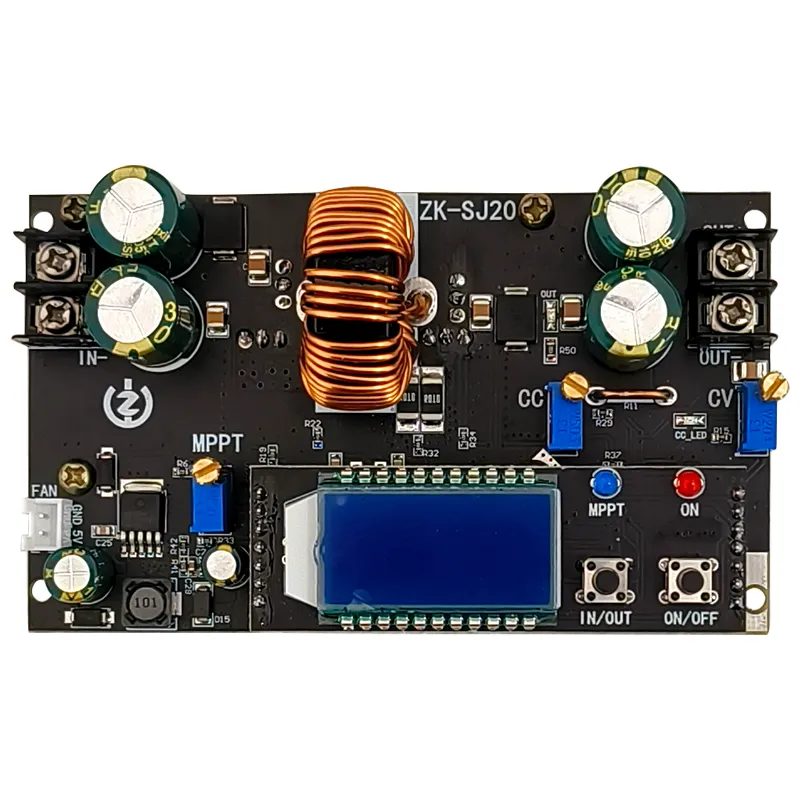
This charge controller module works perfectly well and is significantly cheaper. It will need configuring for the panel voltage you’ve got and the pack voltage you’re working with. But I’m very happy with it.
Depending on what you want to power. There’s no limit to the number of 12v devices that can be hooked up to packs like this. I’m slowly building an arsenal of modular components to be shared with events to reduce the reliance on generators etc…
Some useful bits
MPPT Solar charge control module
Power Meter
Capacity tester
Nice 12v LED spots – These PWM dim nicely without squealing or flickering
12v 24h multi day timer – I use these to turn on/off lights when required to save charge
12v-24v PWM dimmer – Pulse width modulation is a mechanism commonly used to to dim LEDs
12v to USB module – a lot of the lighting or things I want to power are USB powered.
20A inline re-settable circuit breaker – With the BMS overcurrent protection and the fuse this shouldn’t be required. But sharing anyway.
Please let me know what you get up to via facebook or instagram below.